
Thursday, June 7, 2012
Tuesday, May 29, 2012
Final Code
This is the final code for the robot.

The code proceeds as such:
1. Block 1 contains the code to lower the front ram into place (allowing the bot to expand)
2. The next section is a loop which is on infinite loop that repeats the actions until the end of the match
3. The inner code is split into 3 sensor switches
a. Light 1: this code deals with the front light sensor that is meant to stop the bot from driving off the edge once it has pushed the enemy off the ledge
b. Light 2: this code deals with the rear light sensor that is meant to enact a avoidance code
i. First motion block turns backwards to change the approaching angle
ii. Second motion block turns at an angle forward to further change the angle of the opponent
c. Distance 1: this code deals with the ultrasonic sensor and act as an if/if not statement
i. If the opponent is within the area then it will move toward it
ii. It the opponent is outside of the are then it will turn to and search
[distance is 30cm]
Basic Coding

Edge Stop Idea
In order to get the robot to stop after it has pushed the competitor out of the ring, we came up with a touch sensor design that would stop the robot be it drove off the side.

The way this works is that once it reached the edge of the field, the trigger would be released and the robot would stop. However, over time we have found flaws in this. For instance, when the robot rotates or is pushed back, the trigger is released, causing the robot to stop mid action. This could be a serious problem during a match so the touch sensor was eliminated and replaced with another light sensor.
Tuesday, May 22, 2012
Algorithm-1

The group has created an algorithm for the final coding. To give it more details, as soon as the match starts, the plow comes down. Before the match, the plow is raised up in the air to meet the size requirement. Then the loop starts with the color sensor or light sensor. The group is going to test out both of the sensors during the lab in Week 8, and find out which one works better and more effective. However, regardless of the kind of a sensor, the coding won't be much different. When the sensor senses white, which means the robot is in the ring, the code moves onto the ultrasonic sensor. When the ultrasonic sensor detects an object within eight inches, the robot marches toward the opponent. On the other hand, if the ultrasonic sensor doesn't detect anything within eight inches, the robot will perform a zero point turn until the opponent shows up in the sight. This is to not to chase the opponent because the group's robot is not a fast type robot. When the color sensor or light sensor senses black, which is the color of the edge, the robot will perform a reverse arc turn for 180 degrees and back up. This movement will locate the robot out of the edge. After those two moves, the robot will push forward to counter attack.
Tuesday, May 15, 2012
Final Design
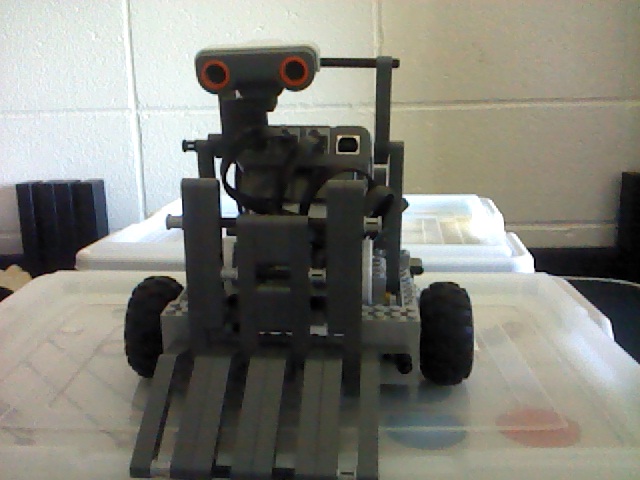
The group has finally come up with the last design for the competition.
.JPG)
[ Figure 1. Front view ]

[ Figure 2. Front view ]
As shown above, the robot will start the competition with the plow raised up in the air. Once the competition starts, the plow will come down immediately.
.JPG)
[ Figure 3. ]
.JPG)
[ Figure 4. ]
The plow has to be up in the air in order to be qualified for the competition size-wise. The plow is a critical factor of the group's strategy. Because the robot has traded off the speed with power, the robot will not be able to perform the counter-attack very well. However, if the plow gets under the opponent's wheels by trapping the wheels and slightly lifting them up from the ground, it will reduce the opponent's power. This will prevent the situation where the robot has to perform a counter-attack code.
.JPG)
[ Figure 5. ]
.JPG)
[ Figure 6. ]
When pushed to the edge, the robot will sense the danger through the color sensor. A different code, other than the attacking code, will be performed when the black color is sensed.
The group hasn't finished the algorithm yet. However, the group will be working on the coding during the lab in week 7, and it will be tested.
Sunday, May 6, 2012
Designing-2


Tuesday, May 1, 2012
Designing-1

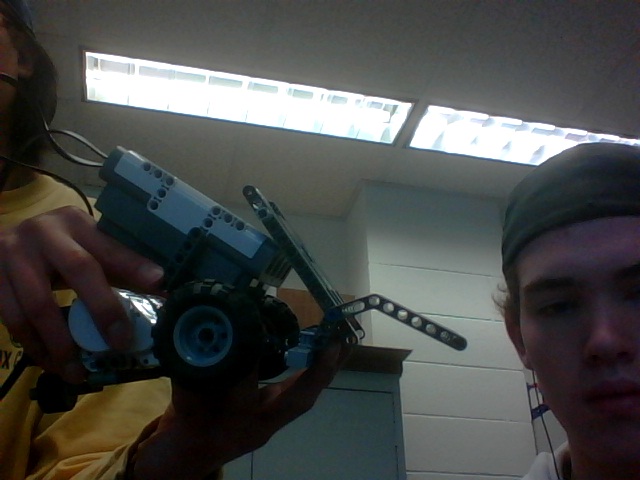
Above is the picture of the robot with Low-High gear ratio (the left side) and High-Low gear ratio (the right side). When it is Low -High gear ratio, one rotation of the motor will rotate less than a half cycle of the next gear which is aligned to the other smaller gear. one rotation of the smallest gear will rotate even less amount of rotations of the last gear which will turn the wheel. In this case, the robot loses the speed. However, the robot turns out to be steadier and more powerful. If the group uses Low-High gear ratio, the coding also has to be changed because the robot will not be able to perform quick counter-attacks.
After re-designed the robot in order to boost the speed, the group changed Low-High ratio to High-Low ratio. Unlike Low-High ratio, one rotation of the motor will cause a full rotation of a big gear, which turns a smaller gear more than once. This small gear is aligned to the other big gear which rotates the smallest gear that is directly connected to the wheel. Therefore, one rotation of the motor causes multiple rotations of the wheel. The robot, obviously, ended up being a lot quicker. On the other hand, the robot lost its power and steadiness. The testing robot which is in a very basic form could push away the robot with High-Low gear ratio.
The group thought that even though the robot loses a lot of speed, it would be the best to be steadier. During the lab in Week 5, the group will upgrade the robot with Low-High gear ratio. Also the coding needs to be done and be tested.
Tuesday, April 24, 2012
Coding
The group has decided to use the color sensor to determine whether the robot should counter-attack the other robot and push out of the ring or keep pushing the other one outward.
The following is the simple code that the group has so far:

The robot moves forward, and once the color sensor that is detached on the back of the robot, for now, sensors the white ring, it makes an arc turn and starts moving forward.
The group will, later, add on an ultrasonic sensor for finding the opponent.
One other problem the group has noticed in lab is that the group's first prototype has good power, meaning explosive, but less agility due to the motor-torque ratio. This is a very bad disadvantage when the robot is trying to get away from the edge of the ring and to counter-attack. During the lab in week 4, the group will try to work on agility as containing the power.
The following is the simple code that the group has so far:

The group will, later, add on an ultrasonic sensor for finding the opponent.
One other problem the group has noticed in lab is that the group's first prototype has good power, meaning explosive, but less agility due to the motor-torque ratio. This is a very bad disadvantage when the robot is trying to get away from the edge of the ring and to counter-attack. During the lab in week 4, the group will try to work on agility as containing the power.
The group's first prototype
Here is the first prototype for our robot. Comment if you have any idea on what can be improved or altered.


 By the way, I already test the push power of the bot. It was able to move the Chem and Calc textbooks when stacked. But the problem was that I had to push the bot down so that it could get traction. See if you can come up with anything that will help with that.


Designing Process and models
Since this is an engineering project we might as well include the engineering design process...

I've also started doing some research into the project it's shown below:
These are some examples of how people have gone about solving the problem we are currently faced with


Subscribe to:
Comments (Atom)